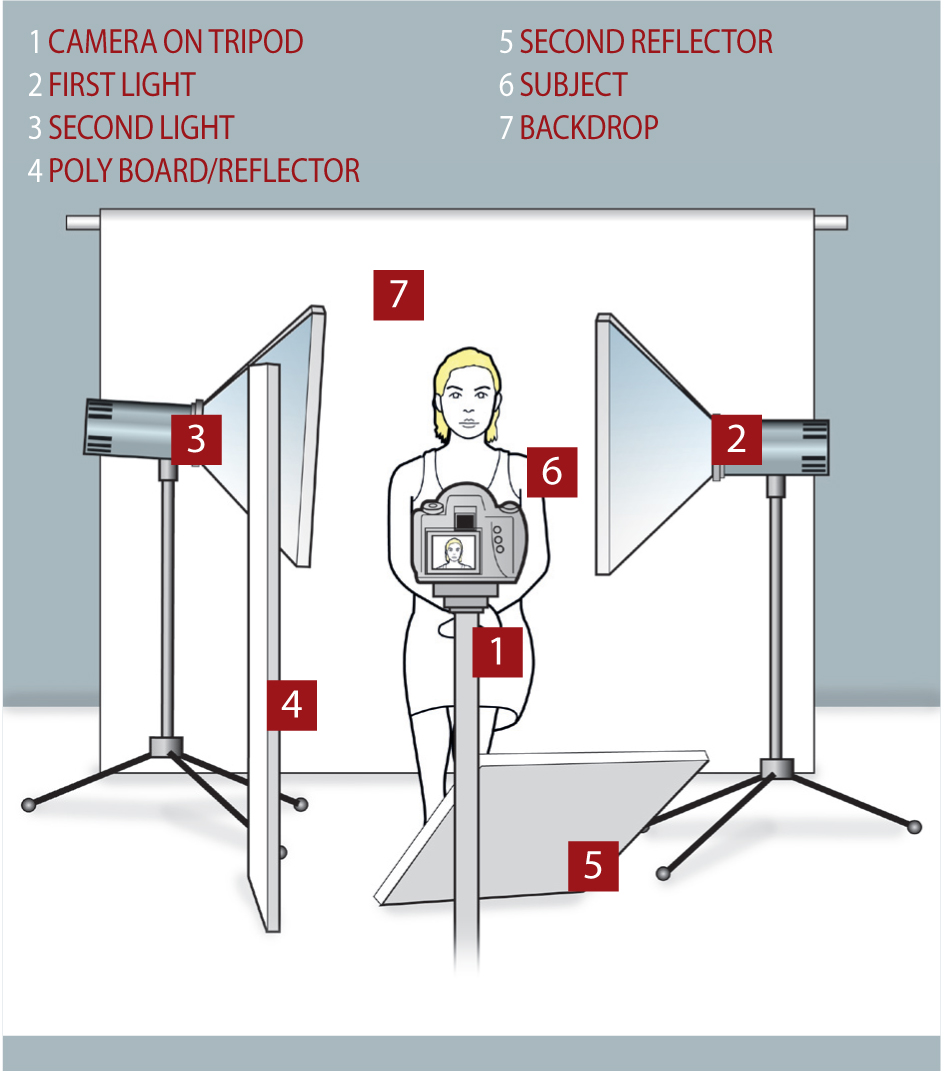
P2, P1, P3, P4, M1, M2
We practised studio lighting set up –

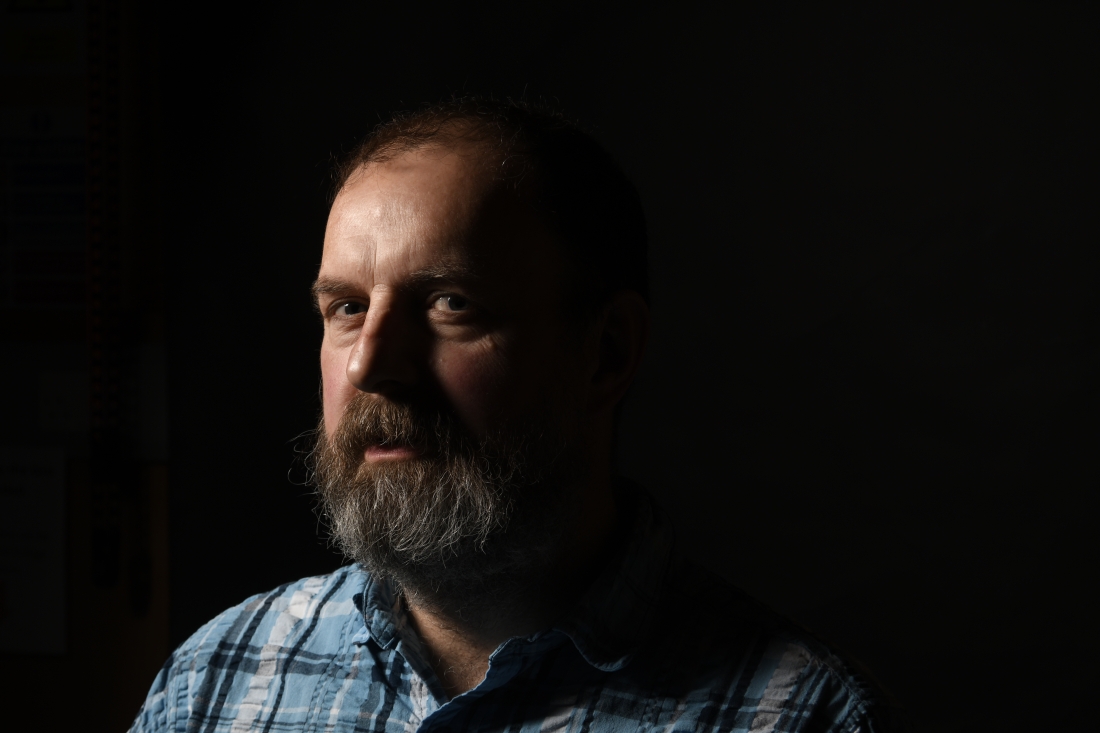
Split lighting
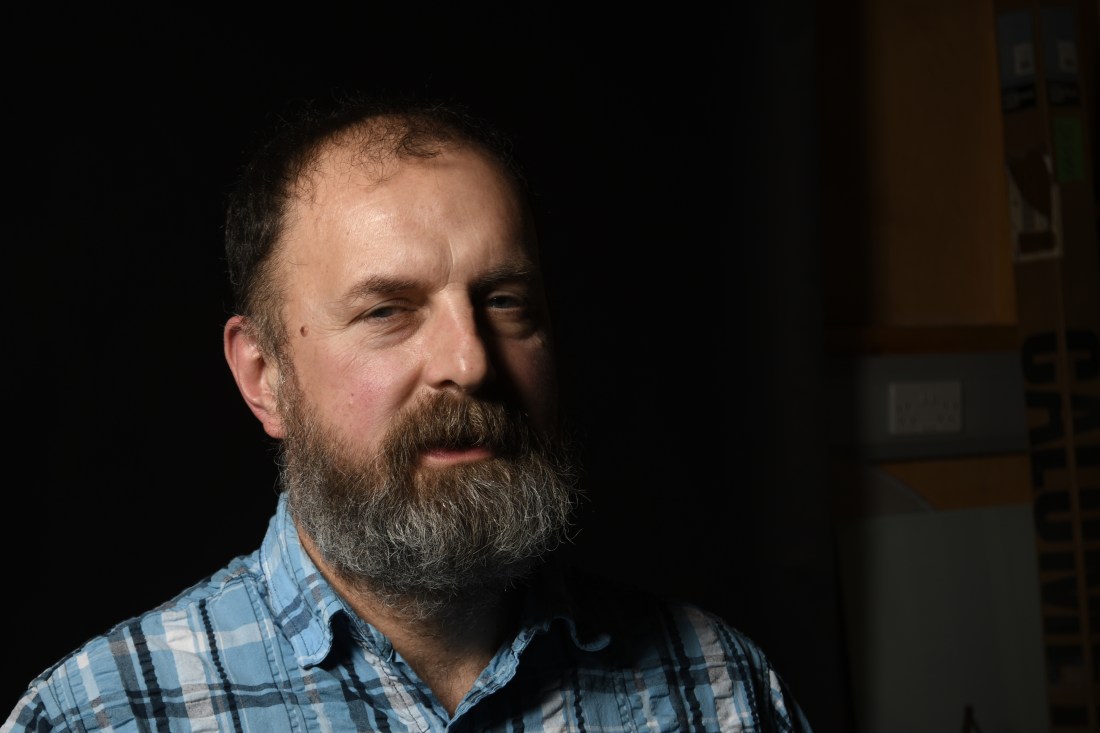
Rembrandt
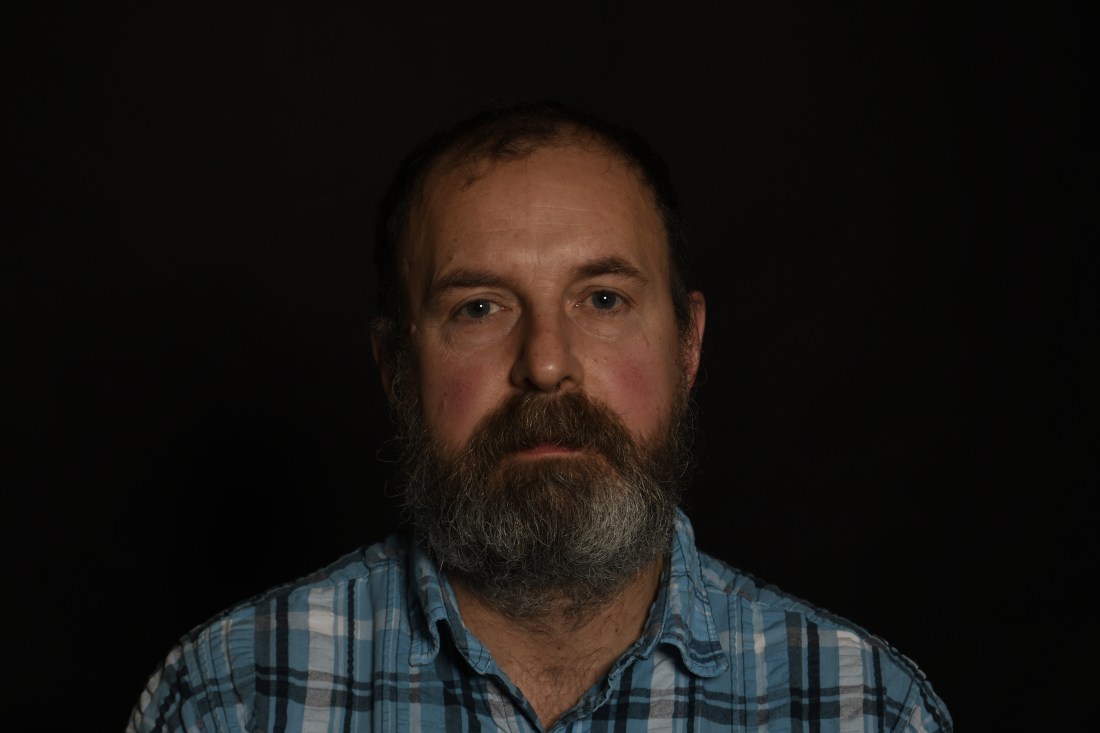
Loop with beauty dish
Loop
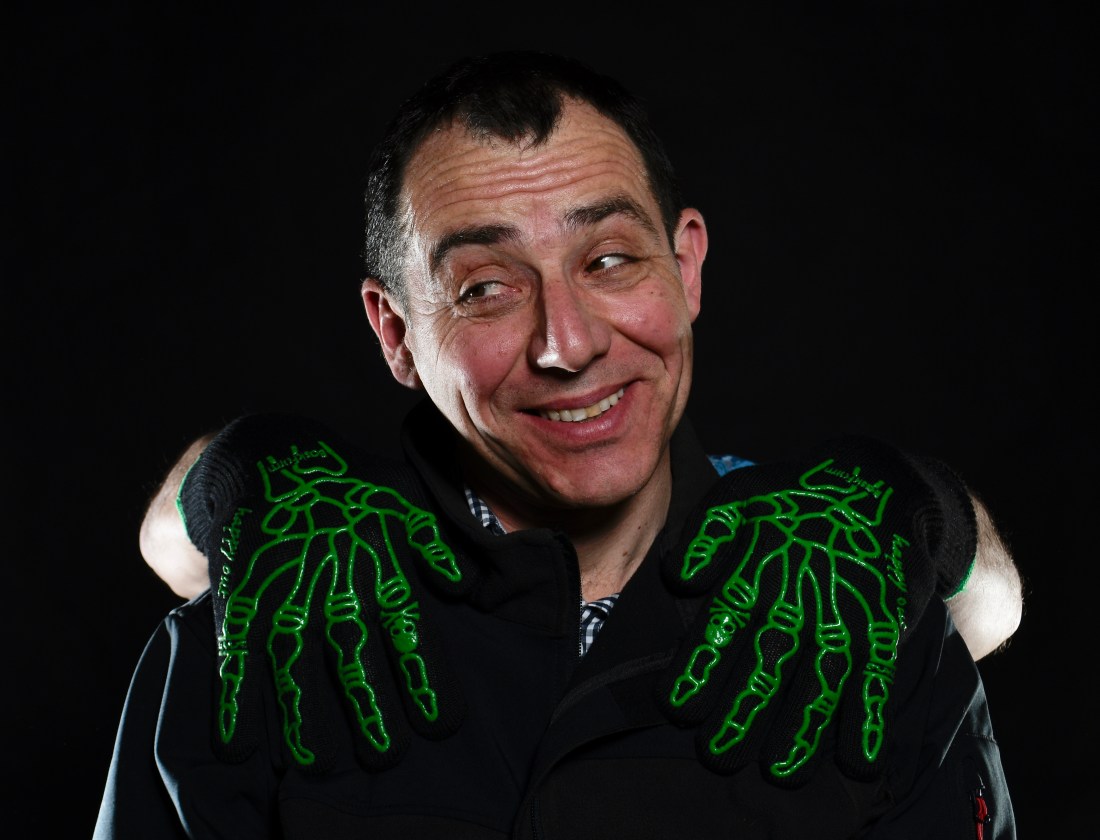
Photo of the week!
Studio Lighting Set Up
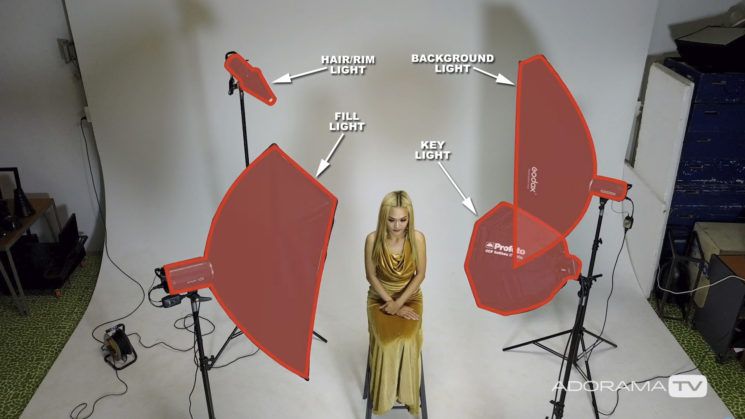
KEY LIGHT
The key light is the main light in your shot. Is the light against which all of the others are balanced. It’s often, but not always, the brightest light in the shot, as you want your subject to stand out. Sometimes, though, you might find that your rim or background light requires more power depending on the final look you’re after.
FILL LIGHT
The fill light is there to help give the shadows a bit of a lift and prevent them fading to pure blackness. The fill light doesn’t need to be very bright at all in order to do its job. A much larger softbox for the fill lighting than the key light is often used. The fill light is simply to fill in the shadows, you don’t really want it casting noticeable shadows of its own.
RIM LIGHT
A rim light adds highlights along the shadow edge of the subject. It adds shine to the hair, or creates a highlight separation to stop your subject from blending into the darker background.
BACKGROUND LIGHT
The background light is pretty much as it sounds. It’s a light that you point at the background to light it up.
HEALTH AND SAFETY
When using a studio, be aware that the lights become very hot. Hoods should be changed over using a protective glove to avoid burns, the model should be considered to prevent them becoming too warm during the session, beware the build up of static electricity on the light. Always use the correct bulbs and fittings as recommended by the manufacturers.
